Monday, September 18, 2017

Simple Whole30 Chili

I just realized that I had this shared on my other blog and NOT here, which is geared for WHOLE30 and PALEO stuff ... doh! So, here you go! Enjoy!

Yes, I do have a Whole30 Compliant chili recipe but Hubby isn't a HUGE fan of the chocolate in it ... as minimal as it is ... so when I saw this recipe, I thought, sure, why not, lets give it a whirl.

I'm glad I did!


AND ... it's perfect for the Sunday Soup theme!

Here's how I did it!

2 pounds ground beef (score, I even have marked down grassfed stuff in the freezer!)
1 onion, chopped fine (hubby hates chunky onions)
4 tbs tomato paste (you know to freeze your leftovers in a Ziploc bag and just break off what you need, right?)
3 tbs chili powder
1 tbs garlic powder
2 tbs cumin
1 carton of beef broth
2 14 oz cans of roasted fire roasted tomatoes or just plain diced tomatoes. The fire roasted ones are really worth looking for though, trust me!
generous dash of salt & pepper

In large pot, cook your ground beef and onions til no longer pink.

Drain the excess fat from the pan.

Add the rest of your ingredients and stir well to combine all.

Allow to simmer 45 minutes or so, giving a stir occasionally. Taste and adjust seasonings if necessary.

NOW.

I had this as just a simple bowl of chili. Topped it with some sliced green onions and a little chopped cilantro.


THEN.

I had this over a bowl of spiralized zucchini ... topped with some diced onions and a squeeze of lime ... oh yeah ...


AND THEN ...

I cooked up some spiralized WHITE sweet potatoes aka HANNAH (them things are HARD to find, by the way!) in some ghee on the stove, laid the taters out on a plate, added the chili and topped with some guacamole and a little salsa ... O M G! That was the BEST!

I need to make these again soon so I can get better pics and share the process!
SWOODLES ... to die for!

See, this Whole30 thing ain't so bad after all, is it?

Looking forward to sharing with some of these GREAT Parties ... go check them out!

*This post may contain affiliate links ... click here to read my disclosure :-)


Friday, September 15, 2017

Spaghetti Squash - InstantPot Style!

*Hey hey, it's a repost but squash season is in full swing here so I figured I'd share this again!*

For Christmas this year, I bought myself an InstantPot Duo Pressure Cooker from Amazon during a big sale they were having. I think it was priced at $78 or so and I had a credit and a bunch of gift cards so I applied all and paid $16 and change.

Yeah. That was a deal.

Of course, Hubby was NOT thrilled with another bulky gadget coming in the kitchen and even though it was very inexpensive, he felt I could have done something different, besides buy another "gadget" ... ho hum .... blah, blah, blah.


So the box sat under the tree, unwrapped until AFTER New Years.  Then the tree was relocated outside and the box was moved to the other side of the room. 

That Saturday evening, Hubby brought the box over to the kitchen, opened it up, grabbed the instruction manual and started reading.

We made pork chops and cauliflower that evening in the InstantPot. It was good and pretty neat, although, we will both admit, a little scary ;-)  Hubby freaked when he released the pressure as he wasn't expecting THAT much pressure to be released. It actually made us both laugh out loud!

Since that night the PC has been hanging out in the main kitchen on the counter, all shiny and waiting for another adventure.  Sunday was the day!


You know that we have this Whole30 thing going on, right? Well, not WE but ME, I, MYSELF, am following Whole30 for the month ... and as a side note, it's freaking hard as hell to stay on course and not be distracted by all that yummy, non-compliant stuff out there ... so I had to get focused and make more arrangements to make sure I was able to eat with the family in a somewhat similar fashion ... and Aldi had the spaghetti squash for $2.19 so I said YES and pulled Nom Nom Paleo's recipe for guidance.

Here's what you need:

2 pounder spaghetti squash
1 cup of water


Cut the spaghetti squash in half through the center, NOT long ways. Be careful as this is the WORSE thing to cut. I used a non skid mat I have and a small paring knife.  I didn't push the knife all the way to the hilt and as you go around, you will hear the squash cracking open ... 

Once open, scoop out as much of the seeds and gunk that you can.  Add a cup of water to pressure cooker and set your trivet or steamer in the insert.  Place squash on the trivet, cut side up. 


Lock lid in place, make sure vent is closed and set pressure cooker on 9 minutes.  Remember, just because you say NINE MINUTES does not mean that this will be ready to eat in 9 minutes ;-) My pet peeve ;-)

After the pressure cooker comes to pressure (Hubby timed, it took 7 minutes) THEN the 9 minute countdown starts.


After timer goes off, release the pressure (quick release), using caution when you flip the vent open.

Using tongs and a large spoon, ladle, pour out any excess liquid from the squash and place on plate to cool for a few minutes. Once cool enough to handle, grab a fork and start scraping.


Beautiful!  And look, no need to turn the oven on and bake for 40 minutes! Always a bonus in steamy Paradise!  I ended up serving mine with the red sauce and meatballs for dinner while the rest of the gang had regular ole' spaghetti ... 


Looking forward to sharing with some of these GREAT Parties ... go check them out!
*This post contains affiliate links ... click here to read my disclosure :-)

Monday, June 5, 2017

Whole30 Island Shrimp

This recipe comes from a book I got a while ago, Primal Blueprint Quick & Easy Meals. which prompted me to get back in to the actual cookbook mode ... even though I have tons of them, I need more that are on track with this new way of eating!

By the way, in case you didn't know, 450 Swagbucks will  give you $5 in Amazon cash ... and that's how I've been buying the cookbooks ...

Another side note ... I do NOT like to have them on my Kindle. I mean, yeah, it's sort of cool to just open up the Kindle BUT I don't like the layout/format whatever. It's not the same as looking at the 2 pages, side by side ... so I've decided no more cookbooks on the Kindle.

Anyways ... 

And ... even better? It's Whole30 Compliant! Sweet!

I renamed the recipe to Island Shrimp with Avocado, then, just Island Shrimp ... more appealing to ME than Tropical Avocado & Shrimp. And yes, there were a few modifications along the way ... if you want the real deal, buy the book and flip to page 57 ...


You can easily double, triple or even quadruple this recipe, as I was only feeding myself for a late lunch and early dinner, I made it in the quantities listed below ... Ready? Ready ...

1/4 cup mango, cut into chunks
1 jalapeno, seeds removed
Juice of 1 lime
dash of salt
3 tbs olive oil
1/2 lb raw shrimp, peeled and deveined (personal note, I always take the freakin tail off, it annoys me)
1/2 tsp cumin
1 avocado, cut into chunks
3 radishes, sliced
1/4 red onion, sliced
chopped cilantro (optional but recommended)

Get out the big gun food processor ... add mango, jalapeno, lime juice, olive oil and salt.


Let it rip and make a sauce. 


Put sauce in fridge to chill a little. Trust me. I wasn't crazy when I tasted to adjust the seasoning, but after it chilled for a bit, it was a whole different flavor!


Sprinkle the shrimp with the cumin and saute in a bit of olive oil til cooked (not overcooked!)


In large bowl, combine the shrimp, avocado, radish, onion and cilantro. Toss with the sauce and serve OR you can pour the sauce over prior to serving. Either way, recommend making this ahead of time and letting chill in the fridge for 45 minutes or so ...


Good? Yes it was ... the radishes really tasted good with the mango sauce. I think I was in love for a minute there.


Note: I have made this with cooked shrimp ... in that case I just added the cumin to the food processor when making the sauce ... I'm all about making do, you know?

Looking forward to sharing with some of these GREAT Parties ... go check them out!

*This post contains affiliate links ... click here to read my disclosure :-)

Sunday, June 4, 2017

Whole30 Ranch Dressing

Hey. It's Sunday ... go ahead and make yourself a batch of this for the week ahead! You can thank me later!

I have made this recipe at 7:45 in the morning right before heading out to work ... 

Yes, by 8:00am, I was out the door ... and it was the BEST batch I've made yet (must have been from the free pouring of the herbs and spices?)


This a super yummy Ranch Dressing ... 

And easy easy EASY to make!!

This recipe is totally from Whole Sisters and I give them FULL credit ... this is just me saying I made it, I loved it and I want to share it with the world!! Give the girls a drive by and check out their site, it's chock-full of good stuff!

Here's how I made it

egg, room temperature
1 tbs lemon juice, room temperature
1 cup olive oil
2 tbs red wine vinegar
1 tsp salt
1 tsp black pepper
3/4 tsp onion powder
3/4 tsp garlic powder
1/2 cup canned coconut milk
handful of parsley, leaves pulled off and stems discarded
dash of dried dill


Grab yourself a tall jar and make sure your immersion blender fits in the top ;-) I speak from experience! Place everything in jar, insert your immersion blender and let it rip. Make sure you go up and down to pull the parsley in to the blades. Once everything is combined and creamy, give a taste, say "yummm, real ranch" and cap that bad boy and place in the fridge. 

I just poured some in a small jar to take to work with me for that salad that salad I made earlier ... I am looking forward to using it to dip my chicken in this evening at dinner time as well ... 

Go ahead, make it and you will NOT be disappointed! 

Looking forward to sharing with some of these GREAT Parties ... go check them out!

*This post contains affiliate links ... click here to read my disclosure :-)

Saturday, June 3, 2017

Whole30 BLT Inspired Chicken Salad

This is a super easy and yummy recipe to toss together ... AND it's Whole30 Approved! Sweet!


It's easy, and really, REALLY tasty!

And surprisingly, I had everything on hand, even the fresh basil (I suppose you could use dried if you had to) ...

1/4 cup olive oil
1/4 cup balsamic vinegar
1 tsp Dijon mustard
2 tbs (give or take) fresh basil chopped
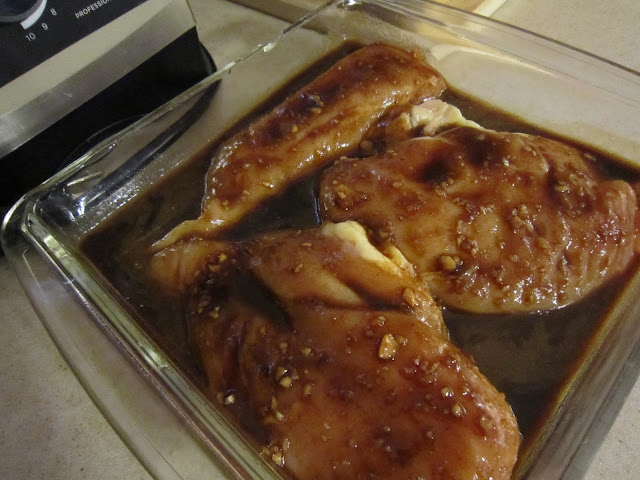
Boneless, skinless chicken breast (I used almost 2 lbs, 4 fat pieces)
Additional basil for topping salad

Mix together everything and let the chicken mix and mingle for a bit in the fridge. AND if you remember, set aside 2 tbs of marinade and set aside for later ... I forgot. I had to make a small batch after the fact.


Grab some lettuce and chop it up. Add this to a large platter.


Slice or dice a tomato or two. Leave these on the cutting board. I like mine diced.

Cook up 2 slices of bacon for each chicken breast you have (I cheat, I always have the ready cooked bacon strips on hand so it's NOT a big deal for me). Chop the bacon. Set bacon next to the tomato.


Cook chicken by preferred method. For me, it's the grill. Of course. Allow to cool a little, and then cut up into bite size pieces.


Add chicken to the lettuce.


Add tomatoes to the chicken.


Top chicken with the bacon.


Drizzle the 2 tbs of reserve marinade over all. sprinkle with a little bit of extra basil.

Serve it up.

Personally, I don't think 2 tbs is going to be enough so I would probably stick with my defective plan and make a small batch up after the fact.

The chicken was GOOD and flavorful. I wouldn't recommend letting it marinade more than an hour ... somehow I think it would just overtake the tenderness of the meat.

This was REAL good and Hubby wants me to make it again. Did I already say that? It really is! I had the leftover chicken served with some more salad stuff ... yummmmm.


Looking forward to sharing with some of these GREAT Parties ... go check them out!

*This post may contain affiliate links ... click here to read my disclosure :-)

Friday, June 2, 2017

Whole30 Sweet Potato Fries

On DAY 3 of Whole30 (well, the 2nd time around) we had burgers and dogs on the grill ... and man, I was sweating it on so many levels. Yeah, it was hot and humid too but I was more worried about:

B E E R

See, when we grill, we sit outside, where it's like a sauna and NOT in a good way ... between swatting at the skeeters and dabbing at the back of your neck with a paper towel, it's almost a given that you Get Yourself a Coozie and have a chilled beer (bonus point for the first person who can Name That Song!) ... but that's not very Whole30'ish like. Actually, it's everything the Whole30 isn't ...

But don't you worry ... I improvised on so many levels and was so proud of myself ...

I did indeed grab a coozie and then a can of LaCroix Sparkling Water Lime ... and you know what? That satisfied that habit/need/desire/whatever to roll the edge of the coozie around the table in a circular fashion, sip from the can and give it a little shakey shakey and set it back down ... run my finger around the rim, play with the tab and so on. Yeah, I am a little fidgity.


So anyways ... I bought that big bag of sweet potatoes from Costco and still had the small bag from Aldis so I wanted to use those up first. Yes, they were starting to show their age a little ...


Turn on your oven to 425 degrees.

Grab yourself some sweet potatoes, wash them and peel them up. Lob off the ends of each one (actually, if you cut  off the pointy end BEFORE you peel you will avoid that annoying stop with the peeler when it hits the tough spot).

Cut them bad boys in half long ways and then cut in to fry size pieces. Uhm, I just sliced, cut and sliced the thicker ones again.

Toss them in a bowl and drizzle with some avocado oil and spinkle with some oregano, salt and pepper. Ok, you can use olive oil if you want but I was so excited about the avocado oil ;-)  Make sure you salt them well. I totally under-salted mine!


Grab a large baking tray and toss a sheet of parchment paper over the top ...

Lay out the fries in a single layer, leaving a little room between so they don't "steam" ...


*Sorry, not sure why these look washed out*

Throw the pan in the oven and let them cook for about 15 minutes. Pull out and turn over, the best you can, trying to keep them in a single layer and a spaced apart the best you can.

Allow to cook for another 10 minutes or so, checking for desired doneness.


Yup, they tasted just as good as they look!  I don't think I'll be buying the frozen bags anymore as they really didn't take any longer to prepare than the frozen ones! 

Go ahead and give them a try!

Looking forward to sharing with some of these Great Parties ... go check them out!

And ... if you want to see more pics of what I'm eating while on Whole30 ... follow me on Instagram ... 

Thursday, June 1, 2017

Whole30 Balsamic Chicken Breast

Here's to another round of Whole30 ... June 2017!

Juicy Chicken Breast.

Guaranteed!


Yup.

Really. I did type that up.

Really, I made that the title.

That's how certain I am that this is GUARANTEED to give you juicy chicken breast~

Would you like to come over and see Hubby roll his eyes when I tell him we are having chicken breast for dinner?

He's tired of chicken breast. Even more so, tired of the dried out pieces of fowl because Hubby likes ALL his meat well done.

Ahem. Might as well drag that chicken breast down the road and back up a few times and do a couple of burnouts over it.

I love chicken breast. But Hubby, he has this odd notion that flavors need to be concentrated, and the only way you can get that is when you cook something on low heat for a looooong time. 

Can I just tell you, concentrated meat is not all that, in my opinion.

So, slowly, not Super Bee or Scat Cat style, I'm changing his way of thinking. It's taking a LONG time, but we are getting there. I try not to be judgmental or condescending (a filet mignon WELL DONE? WTF??) ... and like all things, repeat, repeat, repeat and eventually, it just falls in place.

So this recipe? It's simply the basis for my BLT Inspired Chicken Salad meat. I've had this on the menu numerous times, and a few times (more than I want to admit publicly) we ended up just having the chicken by itself with some veggies (or rice, for "those" people) and called it a meal.

Time and time again, I have been told how freakin' juicy the chicken is. Even by that man, Hubby.

It's simple.

And does not require any funky ingredients or long @ss marinading and procedure. That alone is a BIG hit in my mind!

Here's what you need:

3 pounds or so of boneless, skinless chicken breast
1/4 cup of olive oil
1/4 cup of balsamic vinegar
fresh basil chopped
black pepper to taste

Measure your oil and vinegar in a measuring glass. Add the basil and then grab a fork or whisk and whisk til combined. Don't worry, you aren't emulsifying it, just blending it. Toss in the basil and give it one final stir.

Toss your chicken breast in a ziploc (or shoebox) and pour the oil and vinegar mixture over the top. Flip (shake) the chicken around to coat all the pieces.

Let marinate UP TO one hour. Any longer than that and I think your chicken will get funky, and no one likes Funky Chicken!

When ready to cook, fire up your grill and take the chicken out of the marinade, putting it on a platter to drain a little.  Oil the grates of the grill and then put the chicken on, cooking over medium heat til cooked through, flipping half way through.

TIP: If you want the pretty grill marks, the grates gotta be HOT when you first put the chicken on. IF you oil the grates, you will be able to turn each piece 1/4 counterclockwise without sticking or tearing the meat.

Serve up with a side of green beans or roasted broccoli and ENJOY!

Looking forward to sharing at some of these AWESOME PARTIES! Go check them out!