Thursday, December 31, 2015

Chili - No Beans, Just Chocolate

Seriously, I don't know how else to label it? There are NO BEANS either ... I can remember years ago, eating chili and picking out every last bean and setting them on a plate. I wouldn't eat beans for nothing. Now? I love beans ... but, alas, this new eating plan takes away legumes which means no more beans ...


So, back to the name ... Chocolate Chili with Fire Roasted Tomatoes?

Nah ...

This is from Mel (where I gathered the mayo recipe) ... and it's actually a surprise that I even made this today ...

And only because, I opened up the guest fridge and lo and behold, there was 2 lbs of ground beef sitting in the shoe box. YIKES!!

So quick ... gotta make something ... and I really want to try a couple of new things while Hubby is gone for the 2 weeks ... so here we are ... landed right smack in the middle of WiFi land ...

I actually have Mel's book on the Kindle ... it was a free 'borrow' since I have Amazon Prime ... but I've decided I really don't like the cookbooks on Kindle. Sure, it's kind of cool to just have it propped up on the counter but still ...


So here's how I made it ...

2 tbs oil (olive or coconut)
2 lbs ground beef
1 large onion, diced
2 tbs of chopped garlic (or I guess, 4 cloves?)
2 tbs chili powder
2 tbs dried oregano
1 1/2 tbs unsweetened cocoa
1 tsp allspice (ummm, I used Accent as I am not quite sure what allspice is? I don't see it in the spice cabinet)
1 small can of tomato paste
1 can of fire roasted tomatoes
1 can of beef broth
1 cup water

Ready?

Get a large, deep pot and add your oil. Once it's heated, add the onions and cook til slightly translucent ... then toss in the garlic. Add the ground beef, breaking it up as you toss it in and allow it to cook til no longer pink, stirring and breaking it up as you go ...

Add all your dry spices to a small bowl and mix them up.


Yes, the chocolate is a spice, so add it in!


Dump the spices on the meat and stir well.

Add the tomato paste and stir til combined. Add the rest of the liquid ingredients, stir and bring to a boil. Reduce heat and allow to simmer, uncovered for 2 hours. Yes, it's a long process, all chili should be a long process.


Once the chili is reduced down and thickened, dish it up over and serve ... delicious!


Honestly, the smell didn't get me excited while it was simmering. And the first few samples didn't do anything either. But after sitting with a bowl, a few spoonfuls in to it, I was like "wow, this is pretty damn tasty" ...

Now, a few notes ... as always! I used coconut oil for my oil. Umm, next time I'll use olive oil. I can't wait to finish up the last container I have as I want to try another brand ... Hubby says it makes everything sweet, I think I agree with him.  I also used 90/10 ground beef and didn't think I needed to drain the fat/liquid before adding the spices. I should have. I hate the little bubbles of fat/grease/whatever on top while simmering.

My favorite thing to do? Make some zucchini noodles and have it as a 3 way chili when topped with fresh chopped onions ... yumm!

Wednesday, December 30, 2015

That Damn Fine Chicken


I'm willing to bet that 50% of you know who Michelle is over at Nom Nom Paleo, and the other 50% are probably thinking "hmmm....that sounds vaguely familiar" ... am I right??

So yeah, she makes some stuff that I've not ventured into as of yet (bone broth, organs, etc.) but some of her other stuff I have tried and well, yeah, it's pretty tasty ... but I've yet to find something to say Damn Fine, and I know Hubby would certainly back me up on that!

So what the heck, let's give this here Damn Fine Chicken recipe a shot and see if we have a winner, shall we?


So, crank up Pandora to the station YOU like (I got lucky, not a soul in the house BUT ME! so I put on Black Eyed Peas ... first up was Boom Boom Pow and then ... I'm Sexy and I Know It (sorry, I just can't link up the video, it's a little disturbing).  Um, yes, I did dance around, jumping, shaking, shimmying and fist pumping ... there are NO witnesses!


Yes, I know this is "I Gotta Feeling" but I was too busy dancing to take a pic of Boom Boom Pow!

Once I caught my breath (heck, 50 and dancing like I'm 19 isn't like it was just a few years ago!), I got down to cooking and this is how I did it ...


2 package of bone in chicken thighs WITH skin on (10 6 medium size thighs is what my packages held, thanks Whole Foods for being different on the count)
1 onion, finely chopped
1-2 clove of garlic, finely chopped (um, I process my garlic in advance so I just used a generous tsp)
6 tbs balsamic vinegar
6 tbs avocado oil (yes, I really did have some in the pantry...you can use any other mild oil)
2 tbs coconut aminos (again, yes, I have some in the pantry. Use soy sauce if you don't!)
2 tbs fish sauce (I used the Red Boat I have)
Salt & pepper
Generous sprinkle of Italian seasoning

Quick question: how do you store your measuring spoons? I have something like 7 or 8 sets so I just cram them all in this little stoneware cup ...


Ready?

Mix all ingredients except the chicken in the crock.  Add chicken and toss to coat all pieces well.


Put the lid on and turn crock pot on low for 5 hours.

Ahem ... then Gangnam Style came on ... perfect timing, so I did my little dance right there in the kitchen ... again, NO witnesses, except Kitty Kitty who wasn't sure what to do :-) FYI ... that Youtube link is for the Music Awards live performance and I just think it's awesome how EVERYONE was dancing in the crowd :-)

When you feel the chicken is really sufficiently cooked through, fire up the broiler in the oven.  Remove chicken and place on a rack on a cookie sheet.


Place under broiler, skin side up and allow to broil til a little crispy and slightly charry looking (ahem, there's a very very fine line between charry and BURNT so keep an eye on it...no dishes, no phone, nothing but staring at the oven window!)

Remove, smell, poke (careful, it's hot!) and think, wow, that's some Damn Fine Chicken!


Tuesday, December 29, 2015

Straight Up Veggies

I find that when I buy my produce at Whole Foods, sometimes that costs way more than Publix, I use up the veggies instead of letting them linger and go soft on me. You should note though, that there ARE times when Whole Foods is less expensive than the local grocery store chain. For instance, red peppers were $2.99 a pound this past week at Whole Foods, Publix had them at $3.49 a pound ... and the Whole Foods peppers looked a heck of a lot better!

Anyway. All you gotta do is just chop up some red peppers, sweet onions, green peppers, tomatoes (if you like) and cucumbers in to bite size pieces, toss all in a non-reactive bowl ... then mix up the following in a small bowl:

3 tablespoons olive oil
2 tablespoons red wine vinegar
generous dash of dried oregano
dash of salt
dash of pepper

Dump this all over the veggies, and IF you have on hand, finely slice fresh basil and garnish.

Mix all well, let it chill (if you can wait!) and serve alongside what ever protein you have on hand!


I couldn't wait for it to chill so I grabbed a small ramekin and served up a mini serving to sample ...yup, it was good!

Enjoy!

Monday, December 28, 2015

Perfect Green Beans


For years I dreaded going to my maternal grandmothers as I knew we would be snapping, snapping, and still more snapping of green beans from her garden. She would then can a copious amount of beans which meant every dinner we had at her house involved green beans.

::shudder::

Wimpy, mushy, overcooked green beans, no kidding.

Fast forward many, many years ... my sister in law was making green beans one evening and had them sitting there, already cooked, just needing to be reheated a little for dinner. They looked beautiful, bright green and smelled heavenly (aka, garlickly).  I told her they smelled yummy and she was like "go ahead and have some, there's plenty" which at that time, I had to say no thanks, I'm not a fan of green beans.

Whoops.

I was instantly shamed in to trying something that I had said smelled delicious yet wouldn't give it a try?? Yeah. That's what it took.  I feel in love with her green beans.


So for a few years, I continued to make them HER way ... they were good but had a lot of this and that and wasn't really a "simple" or "fast" side dish to throw together.

THEN ... 

I discovered ghee. You know, the clarified butter stuff? Yes, it's a little pricey, BUT you only use a little bit so it last a LONG time!


Here's what you need:

2 pounds of green beans, trimmed and cleaned. Snap the longer ones in half
1/2 onion (any type), finely chopped
1 garlic clove, chopped
salt and pepper
tsp of ghee


Melt the ghee in a large skillet and then add the rest of your ingredients. Toss to coat all (or at least most) of the beans and then put a lid on it. Allow to cook for 15 minutes or so over medium low heat.

Remove lid, toss the beans again and taste to see if cooked to your desired crunch. I obviously like MINE crunchy.  Once done, remove from pan, add a little more salt and pepper if desired and serve up.

I have to chase the Princess away from my lunch stash!

Enjoy!

Looking forward to sharing over at some of these GREAT blog parties!!


Sunday, December 27, 2015

Dairy & Grain Free Ranch Dressing


Yes, I have a few other creamy dressing recipes, and yes, there is one that's dairy free ... but this one? This one is THE ONE to make!


Uh huh, it is!

Easy? Yes. If you have an immersion blender (you know, those stick things?) ... this recipe does not require heavy whisking, a blender or food processor. And before you ask, I have NO idea how it would work with one of those options, I've only made it with the immersion blender. Don't have one? Do yourself a favor, grab your 20% off coupon from Bed Bath & Beyond and go pick one up for $15 ... you will be glad you did after you make this recipe!!  Promise!


Ok, lets hop to it and share this baby!

1 egg, room temperature
1 cup light olive oil
1 tbs lemon juice
2 tbs red wine vinegar
1 tsp salt
2 tsp black pepper
3/4 tsp garlic powder
3/4 tsp onion powder
1/2 can of coconut milk
2 tbs of dried parsley
1/2 tsp dried dill

I had picked up a couple of these boxes of coconut milk a few months ago to try with some other recipes I have and really like the ease of only using a half of a box ... just a slight issue though when you put in the fridge as you have to squeeze it out when it becomes solid ... just a heads up.
Grab yourself a quart size large mouth canning jar or any other jar that has a wide opening (wide enough for stick to go in).

Drop in all ingredients as listed.


Insert stick blender all the way to bottom of jar and turn on, leaving the blender on the bottom of jar.

Once it starts to incorporate go ahead and move around the blender til every thing is incorporated and fluffy.

I was afraid that I might go over the top on this batch but whew, it was close but stayed pretty contained!

Taste and if necessary, add additional seasoning.

You can modify this recipe to become a creamy italian dressing ... omit the parsley and dill and add 2 tbs of italian seasoning instead ... pretty tasty too!

Saturday, December 26, 2015

Apple Treats

Need a healthy snack? Serve up some apples!

Seriously. These are so yummy ... all the "kids" (who are in their early 20's) and adults (my friends, 40s/50s) love these things!

So here you go, a repost of the original post from a while ago ... go ahead, give it a try!


I had this pinned for a little while and kept thinking, I need to give this a try ... I mean, heck, it's super easy and sounds GOOD, so what took me so long?


Them apples are called Pink Lady ... 

The thought of cutting up the apples into these thin slices is one of the reasons I held off making these the first time.


Yes.


I have one of them apple corer/slicer thingys ... AT WORK. See, when I turned my boss on to Honey Crisps (it was the LEAST I could do for him) I sort of donated my apple slicer/corer thingy to the office ...


So finally, I stopped at got me another one the other day. $9.99. Forgot my stupid Bed Bath & Beyond 20% off coupon ... but I also found out I can take the receipt back with the coupon and they will give me 20% back ... excellent!


A few days later, I was still looking at the apples I had picked up earlier in the week and said, I need to just make this... and, um, YES, you should too! It's good ... and well, heck, loaded with vitamin C and all natural ingredients ... SCORE!!


All you need is TWO apple (or ONE would do if you wanted, but really, you will WISH you had two!), ONE medium size lemon (I had Costco sized, so I used half) and ONE orange (I had a smallish orange).


Slice the apple as thin as you can. Place apple in a sealable bowl. TIP: Use glass if possible, makes them so much colder.


Juice lemon and orange into small bowl or measuring cup and then pour directly over the apple slices. I've got one of these gadgets that works great on lemons and limes, and even smaller oranges.


Pretty nifty ... do yourself a favor and buy the metal one, skip the cheaper plastic one ...

cool gadget, make sure you put cut side down in the bowl part. Hubby still forgets!


juiced and ready

a few lemon seeds caught!


Toss the container in the fridge for an hour or so (you can go longer, I did)


Eat. Enjoy. BE PREPARED TO SHARE if someone takes a slice to taste ... ahem, that would be the boss :-)


Seriously, this is really really, REALLY good ... even my finicky receptionist who will eat nothing but her own home prepared food tried these and said "wow" ... I made this 4 days in a row last week to take to work and now I'm thinking these may be making an appearance at some poolside parties this summer!


Yes, the lemon and orange juice keep the apples from turning brown ... beautiful! 


Enjoy!!


Looking forward to sharing with some of these GREAT Blog Parties! Go check some out!

Friday, December 25, 2015

BLT Lettuce Cups

Tip: if you need additional reminders, grab a whiteboard and write in the meals for the week. I wasn't putting days as I just wanted a reminder before of WHAT I had planned to make!


This was MY lunch on Day 6 ... and if you follow me on Instagram, you can see what I've been eating for about 75% of the meals ... I just can't be bothered remember to snap a photo each time I -eat!


Lets make these little food bombs, shall we? *This was for ME and me only, otherwise I certainly would have doubled up, tripled up, the ingredient list!

4 lettuce leaves ... I used butter lettuce as that was what I had on hand that needed to be used up
3 slices of cooked bacon, crumbled
6 grape tomatoes, sliced in half and then cut in half again
1/2 avocado, diced (I need to perfect my dicing and separating skills)
1 stalk of green onion
dab of mayo (isn't it time you learned how easy it is to make?)
dash of olive oil
dash of dried italian seasoning
dash of salt and pepper

Lay out the lettuce leaves on a plate and pat dry if they are still a little wet. 

Toss your tomatoes in a small bowl and add the olive oil, salt, pepper and italian season. Stir and set aside.

Walk outside and think, wow, maybe fall is coming soon to Paradise then realize it's just the wind blowing the humidity out ... nothing major to get excited about.


Come back in and give them tomatoes a stir after about 10 minutes of sky gazing. Drain the excess liquid if any out of the bowl.

Add a bit of mayo to the center of each lettuce leaf, smear a little to spread out.  Add the tomatoes to each lettuce leaf.

Sprinkle with the bacon pieces.

Sprinkle with the avocado.

Garnish with the sliced green onions.

Serve up and Enjoy!

See ... eating Whole30 compliant is all that big of a deal after all, is it? 

Looking forward to sharing with some of these Great Parties ... go check them out!

Thursday, December 24, 2015

Lime Cilantro Cauliflower Rice


At last, I found the elusive Riced Cauliflower over at Trader Joe's on North Federal Highway here in town ... of course, I only grabbed 8 or so bags but gave away 3 to a friend and now can't locate it again! The dude on the floor warned me that it goes fast when they have it in stock ... no kidding?


I have turned so many people on to this stuff in the past few weeks
that I may never find it again at the Trader Joe's by my house!
*Type 1 Diabetics should be stockpiling this stuff with only 3 grams of carbs per serving!

This isn't really a recipe, so to speak, but more of a process. And I'm looking forward to making it again!


Here's what you need:

1 12 oz bag of riced cauliflower (or you can certainly rice your own, it's just messy)
handful of cilantro
1 lime

Toss your cauliflower rice into a non-stick skillet over medium heat and allow to heat through without messing with it much. I used my Green Pan and didn't use oil or anything else and it was cooked in 15 minutes.


Add the cooked cauliflower to a bowl and toss the cilantro in. Zest your lime, cut the lime in half and squeeze both halves over the rice/cilantro mix.

Give a quick fluff/stir and serve up ;-)

I had made this for Taco Tuesday (which really was a Taco Wednesday) and had a taco bowl - shredded lettuce, "rice" and meat ... can I just tell you how dang happy my tummy was?? It was pretty tasty and I can honestly say that the day of Taco Salads are gone ... I will forever be having taco bowls (ohhh....a knock of Chipotle bowl is in the future!!)

Oh. And by the way? It's Whole30 compliant ;-)

*I will need to start stalking Trader Joes' starting right after the new years as this stuff is on back order and expected delivery is in the first 2 weeks of January ... need to make room in the freezers NOW!

Looking forward to sharing with some of these GREAT Parties ... go check them out!!

Wednesday, December 23, 2015

Sweet Potato Rounds

I never really knew if I liked sweet potatoes or not ... I mean, heck, who doesn't like something covered in brown sugar (or maple syrup) and then marshmallows over the top? What I didn't like was the stringy-mushy texture of that stuff ... but I would take a little orange stuff and LOTS of toasted marshmallows during the holidays.

Now. Not so much. It does kind of suck when you grow up and learn to read the labels and whats good for you and what's really not. Being an adult does stink sometimes!

So ... with the Whole30 thing underway (which by the way, I jumped ship on Day 6 at lunch time and hurried up and caught up to the boat and jumped back on asap!) I'm back to experimenting ...

And ...


I give you SWEET without the cloying, sticky stuff ...

This was so stinkin easy to do that I'm actually surprised I never tried it before ...


Ready?

Grab yourself a couple of sweet potatoes ... I used 3 here and peel them.

Once peeled, go ahead and slice them thin. I think mine were about 1/4 inch or so thick, I wanted them somewhat thin to cook faster.

Toss them in a bowl and drizzle with a little bit of olive oil and season up with some salt, pepper, garlic powder (not salt), and combine with your hands to get them all coated.

Fire up your grill to medium high, and lay them out flat on the grill. I used this nifty grill mat which is about my 5th time using it and I'm in love with it ... I need to do a product review for you as I think it's a great thing to have on hand!

Allow to cook on one side til it starts to get a little charred, then flip. Cook this side til they are tender, but not to the point of falling apart. These took about 15 minutes or so and I was racing against the weather as we had some pretty bad rain this past weekend.


My original plan was to use them as "buns" for the sliders we were having but after the first one like that, I simply ate them plain, like fries.

Yes, I will be making these again in the very near future!

So, tell me, do YOU like sweet potatoes? All mushed up? Or intact, like this?

Looking forward to sharing over at some of these GREAT Blog Parties ... go check them out!

P.S. Are you following my progress over on Instagram? You should ... I'm trying to post my meals as they go!

Tuesday, December 22, 2015

Salt & Vinegar Chicken Wings

We have this little pub down the street that is pretty much the only place we hit up for a quick dinner and drinks during the week ... I'm a sucker for the bacon blue cheeseburger with a few Coors Lights or Coronas ... Hubby likes to be different and has probably tried everything on the menu.  His favorite? The Salt and Vinegar Chicken Wings ...

Yeah, I like them too! Um, to the point where one evening he just gave me "the look" when I grabbed the last flat. Not a drumette fan, sorry! Oh, and those were his dinner ... whoopsie.

So, what the heck, lets save ourselves a little bit of dough and figure out how to make something we both LOVE to order when we go to eat, shall we??

So, I realize AFTER they thawed that there are 4 wings per pouch and when I buy them, they come in a sleeve of 3 pouches (12 wings or 24 pieces split) I only have 2 more packages left in the freezer which only equals 8 wings, or, really, 16 pieces after you break them up. I didn't really need 32 total this evening!

It's easy. Really easy.

a little too charred for my taste but still yummy ... I'm taking control of the cooking next time!

3 to 3 1/2 pounds chicken wings. IF they are split in 2, it's cheaper (whole foods had these for $2.19 a pound, pretty cheap), and it's easy to split them (see below)
mellow seasoning of choice ... I used Hubbys mixture of salt, pepper and garlic powder that he keeps in a shaker bottle
4 tbs white vinegar
2 tsp table salt

See here for how to split your wings into drumettes and flats ... I thought I would do a totally separate post since its pictures of ALL raw chicken, you know?

Dump your wings in a large bowl and lightly sprinkle the seasoning of choice over the top. Toss to coat all the wings. Remember, you don't want to over season these with salt at this point (see the name of the wings: SALT and Vinegar Wings).

You can either bake these or grill them. We opted to grill them that night. I suggest indirect heat as they WILL flare up and you WILL char them in a heartbeat. If you opt to bake them, just lay them out on a baking tray lined with parchment paper so they don't stick. Bake or grill to desired doneness, making sure you flip half way through cooking time. Hubby likes his super done (no slime inside by the bones). Ahem, there were a 'few' flareups and neither one of us was quick enough to move the pan and spritz the fire with water. Take my word, do not grill over direct heat!

While wings are cooking, grab another large bowl (or just clean the one you just used) and add 4 tbs of white vinegar and 2 tsp salt to the bowl. Whisk to mix well and set aside.

Once wings are cooked, toss them in the bowl with the vinegar and salt and toss to coat well. Serve up ...

These are pretty damn tasty and so want to stock up on wings again asap so we can enjoy these more often! Go ahead and give them a try, let me know what you think?

Monday, December 21, 2015

Shrimp & Avocado Salad

I really love it when I come across a recipe that I have ALL the ingredients on hand to make, except one!  I mean, it's like mandatory that you make it!

This original recipe comes from Skinny Taste (which, by the way, I got her cookbook for Christmas and I'm sad to say I've not cooked ONE recipe from it yet!) and of course, I made a 'few' modifications but the whole idea comes from there!


And yes, it's Whole30 compliant (of course, I made this at the start of Week 2 and was still in the excitable mode!)  It will stay around for a repeat, trust me!

Here's how I did it:

1 lime, juiced (Costco)
1/4 red onion, finely choppped (Aldis)
1/2 tsp avocado oil (or olive oil) (Costco)
dash of salt (Costco) dash
black pepper to taste (Costco)
1/2 pound of cooked, peeled shrimp, cut in bite size pieces (8 ounces or thereabouts) (Whole Foods a while ago)
4 sangria tomatoes, chopped (Costco, these are like little tomatoes)
1 avocado, diced (Costco)
1/2 tbs cilantro, chopped (Publix)

The shrimp was frozen but not to worry, a quick rinse under running cold water 
defrosted these bad boys quickly!

In a small, non-reactive bowl, combine the lime juice, oil, red onions, salt and pepper and let that sit for at least 10 minutes to mellow out the onions (cool tip, dontcha think?)

My lime was pretty juicy so I had a lot of juice but all is well!

In a LARGE bowl, combine the shrimp, avocado and tomatoes. Add the smaller bowl of the onion mixture and combine. Gently stir in the cilantro.

That looks like a LOT of avocado, but again, all is well!

Serve up and enjoy!

Looking forward to sharing at some of these Great Parties ... go check them out!

*Affiliate links are part of this post ... check out my Affiliate Disclosure here!*

Sunday, December 20, 2015

Making Mayo

MAYO.
 
Yes, mayonnaise!
 
I'm a mayo snob, I'll admit it. Do NOT ever put that Miracle stuff anywhere near my plate ... and no, I do not like Kraft either. Only Hellman's ... thank you very much.
 
BUT ... once I made the stuff from scratch (it's really easy, I promise!) I never ever looked at another sale jar of mayo again.
 
Oh. Well. Sort of ... I do buy the jar, I think maybe 2 in the last 12 months? Only because if we are doing something with heavy mayo, I'd be dying in the kitchen to keep up, you know?
 
The recipe calls for FIVE ingredients, that's all. F I V E! Go grab your jar of mayo from the fridge and look at the ingredient list. I'll wait. Ok, are you convinced maybe you should give this a try?

A few notes:

1.  Make sure all ingredients are at room temperature.

2.  Give yourself 5 to 8 minutes of undivided attention as you need to do this slowly.

3.  Buy a large bottle of LIGHT Olive Oil. I know, it doesn't have ALL the benefits of extra virgin, but if you use regular, you will mayo that taste VERY strongly of olive oil ... and while some people might be ok with that, we were NOT.


Seriously, this is all you need.


This was made with regular olive oil ... see how it's got a yellowish/greenish tint?


When the oil goes on sale with a buy one get one free, I'm stocking up baby!
 

Ok, are you ready to give this a try?

1 egg
2 tsp lemon juice (yes, I do use the stuff in the bottle IF I don't have fresh lemons)
1/4 cup olive oil
1/2 tsp salt
1/2 tsp dry mustard powder
1 cup olive oil


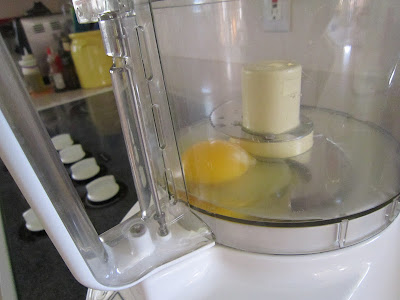
Put the egg and the lemon juice in your food process and walk away for an hour or so. Seriously. See up there ... PATIENCE? In order for the stuff to incorporate and emulsify, it MUST be room temperature. Honestly, I had mine out for 2 hours the first time, an hour or so is normal for me.


When it's all to room temp, go ahead and cap the processor. Drop the dry mustard and salt in the chute, fire up the machine and pour the 1/4 cup of oil in and let it rip for a minute.


Now comes the FUN part ... roll your shoulders, flex your triceps muscles and S L O W L Y start drizzling the 1 cup of oil down the chute. Be slow about it, you want a very thin stream of oil going in!

The stuff will start spattering around and you'll be tempted to stop and scrape but DON'T GIVE IN, keep drizzling it through the chute.


Suddenly, it sounds like slapping. Keep drizzling.


And just like that, the whole thing changes. The sound, the feel everything will suddenly become a smooth hum. You are almost there. Keep drizzling. Ignore the cramp in you triceps, keep drizzling. This is nothing folks, keep drizzling.


When you get down to that last bit, RESIST THE URGE to just dump. Keep drizzling.


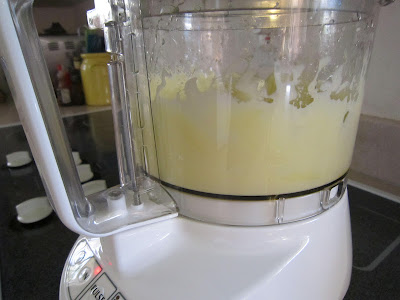
When olive oil is all emptied out, let it continue for about 30 seconds more. Turn off processor and flex arm.


Rub hands together, give an evil grin  to the Hubby and take off the lid.


Hot Diggity Dog!! Creamy. Luscious looking. I slathered some right on a piece of turkey and ate it. Yummm. Oh, how about some deviled eggs using the mustard powder along side?? Oh, I think I might be on to something here!


This made a nice size jar of fresh mayo. It should keep as long as your egg was fresh. I have a feeling it would last a little longer than a week beyond what the egg carton says for the "sell by date" but if you follow food police guidelines, use that for your 'expiration' period.

Can you tell which is EXTRA virgin and which is LIGHT?


Honestly, this is an every 7 to 10 day occurrence in the kitchen. Nobody even thinks to remind me that there is an egg sitting on the counter ... they KNOW its for MAYO and I think do a little skip in their head as something yummy is fast approaching!


Go ahead, whip up a batch. I think you will be oh, so very surprised AND hooked.